

CF-3600A/3800A Frequently Asked Questions
Question number FAQ-0273
The point clicked on the screen is misaligned with the cursor's position.
You can start the "PenMount DMC900 and DMC9100 Utilities" in the Start Menu and align the clicked point with the cursor position.
- Startup of Utilities
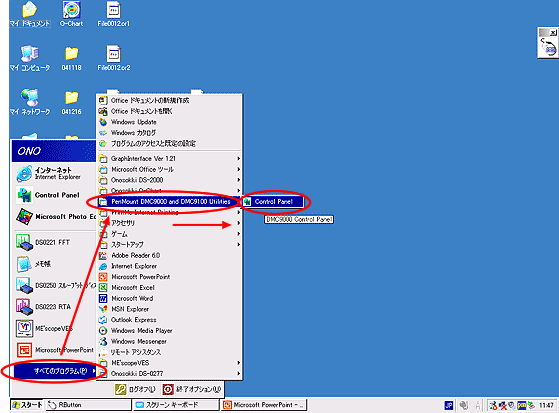
From the Start Menu, select "All Programs" and click on "Control Panel" under "PenMount DMC900 and DMC9100 Utilities" in the list. The "PenMount Control Panel" will open, so click on the leftmost tab labeled "Calculate."
|
|
|
|
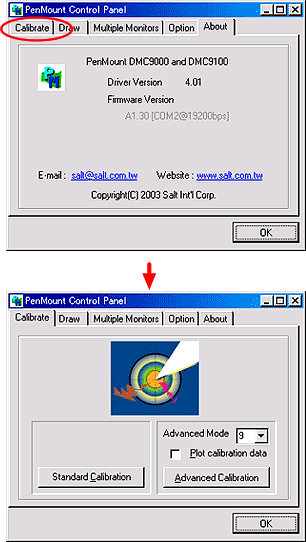
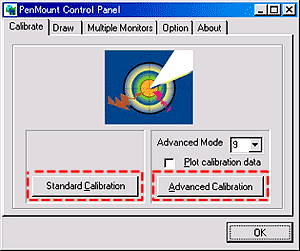
There are two methods: 'Standard Calibration' and 'Advanced Calibration'. If the 'Standard Calibration' is insufficient, please proceed with the 'Advanced Calibration' operation.
|
|
- Operation of 'Standard Calibration'
Next, select 'Standard Calibration' as shown.
|
|
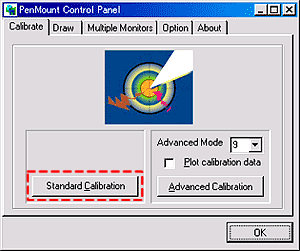
The touch panel of the CF-3600 changes to the "Touch the red square" screen, and as shown on the lower screen, blue arrows with red dots at their tips appear sequentially on the screen. Please touch the red dot at the tip of the blue arrow in order from 1 to 5. It is recommended to use a stylus for touching. Do not use sharp objects (such as mechanical pencils) as they may scratch (or tear) the touch panel.
|
|
|
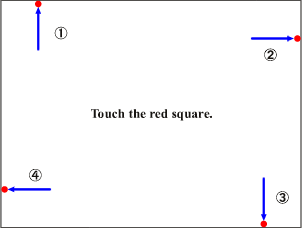
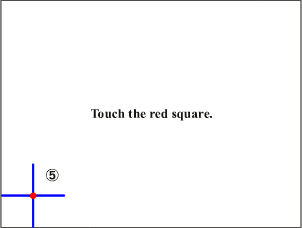
Touching buttons 1 to 5 in order will automatically adjust the settings and return to the original screen (the state before pressing the Standard Calibration button).
- Operation of Advanced Calibration (Extended)
If 'Standard Calibration' is insufficient, 'Advance Calibration' will be performed following the steps below.
As shown on the screen below, the default value to the right of 'Advanced Mode' is '9', and calibration will be performed at 9 points on the screen. Additionally, checking 'Plot calibration data' will display the results of the calibration after it is completed.
|
|
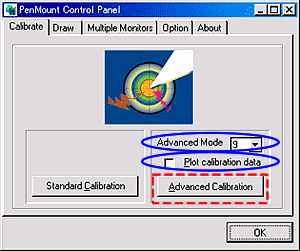
Select 'Advanced Calibration'. The CF-3600's touchscreen will change to the 'Touch the red square' screen, and a blue arrow with a red dot in the center will appear sequentially on the screen as shown below. If the 'Advanced Mode' value is set to the default '9', please touch the red dot in the center sequentially from 1 to 9. It is recommended to use a stylus for touching. Do not use sharp objects (such as mechanical pencils) as they may scratch (or damage) the touchscreen.
|
|
|
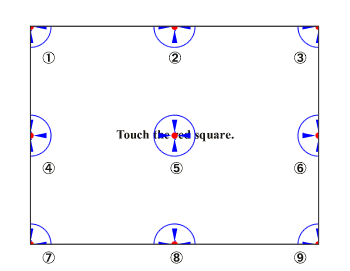
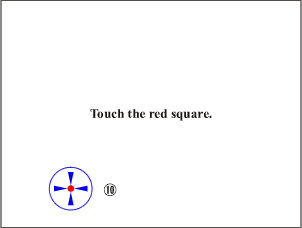
By touching sequentially, adjustments will be made automatically. Finally, clicking on the tenth red dot on the screen will return you to the original screen (the state before pressing the Standard Calibration button).
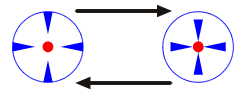
The mark with a red circle in the center animates from the left state to the right state until it is touched.
|
|
Furthermore, if 'Plot calibration data' is checked, the results of the calibration will be displayed after the calibration is completed.
|
|
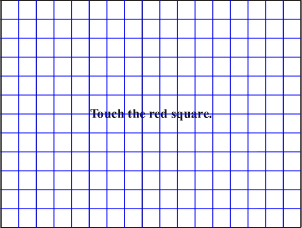
The line on the blue grid shown above represents the calibration results. If there is a large discrepancy (when the touched point and the position on the software screen are significantly misaligned), the blue grid lines will appear curved. However, even if the lines look curved, if there are no issues when using it after calibration, the calibration process is considered complete.
Touching the screen will return it to the original screen (the state before pressing the Standard Calibration button).
Last updated: 2005-02-14