

Torque Meter Frequently Asked Questions
Question number FAQ-1336
TS-2700 Voltage Output
I will explain the analog output. For information on parameter settings, please refer to the 'Setting Procedure Manual'.
1. Torque voltage output
The TRQ OUT connector on the back panel provides an analog voltage output of torque. The output voltage is ±10 V when the capacity value of the torque detector set in the 'input of set value' is reached.
| output voltage | ±10 V |
|---|---|
| Output Connector | C02 type (BNC) connector |
| appropriate load | more than 10 kΩ |
| time constant | 63 ms / 500 ms switching |
The time constant at the time of shipment is set to 500 ms. By switching the analog output time constant in the 'input of setting values' setting item, it can be changed to 63 ms.
|
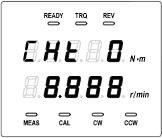
 How to calibration torque voltage output
 |
|
Setting range: 0 to ±0.999
・The LED of the input section blinks
・Use the right arrow key to move the input position (digit)
・Use the up arrow key to change the value. "−" is displayed with the MENU key.
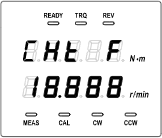 |
|
Setting range: 9.000 to 10.999
・The LED of the input section blinks
・Use the right arrow key to move the input position (digit)
・Use the up arrow key to change the value
・The 4th and 5th digits display only 9 or 10. Each time the up arrow key is pressed on the 4th digit, it alternates between displaying 9 and 10.
2. Voltage output of rotation
The REV OUT connector on the back panel outputs an analog voltage corresponding to rotation. A voltage of 10 V will be output for the rotation capacity value set in the 'Input of Setting Values'.
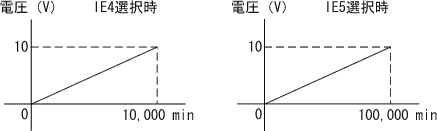
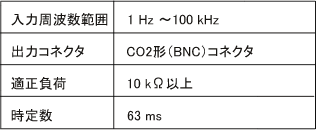
<Attention> The accuracy guarantee for the input frequency is from 10 Hz onwards. The rotational speed depends on the number of rotation signal pulses and the input frequency. For example, when the rotation signal pulse is 60 P/R and the input frequency is 10 Hz, the rotational speed is 10 r/min, and at 1 Hz, it is 1 r/min. |
|
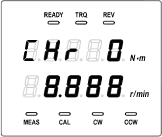 |
|
Setting range: 0 to ±0.999
・The LED of the input section blinks
・Use the right arrow key to move the input position (digit)
・Use the up arrow key to change the value. "−" is displayed with the MENU key.
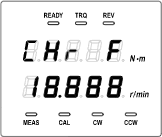 |
|
Setting range: 9.000 to 10.999
・The LED of the input section blinks
・Use the right arrow key to move the input position (digit)
・Use the up arrow key to change the value
・The 4th and 5th digits display only 9 or 10. Each time the up arrow key is pressed on the 4th digit, it alternates between displaying 9 and 10.
Last updated: 2006-05-22