

sound level meter Frequently Asked Questions
Question number FAQ-1234
LA-7000 Series Optional Feature Addition Installation Instructions
Installation procedure for additional optional features.
Notes on additional installation options.
- Be sure to complete the firmware update before adding optional installations.
The latest update files are stored on the SD memory card. - Please follow the steps to add the optional installation.
Installing with incorrect steps may cause malfunction or failure of the sound level meter. - Always supply power from the AC adapter during installation.
- During installation, do not remove the SD card, disconnect the power, or switch to OFF.
It may cause malfunction or failure of the sound level meter.
Update the firmware to the latest version.
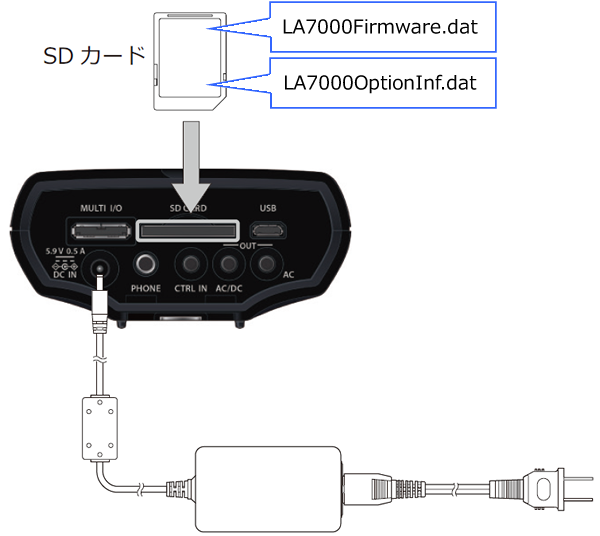
Prepare an SD card that contains the optional license information (license file).
The root directory of the SD card contains the latest firmware update file (LA7000Firmware.dat) and the license file (LA7000OptionInf.dat).
Start the sound level meter.
After switching the power supply of the sound level meter to the AC adapter, turn the power ON. Insert the SD card that contains the update files into the sound level meter.
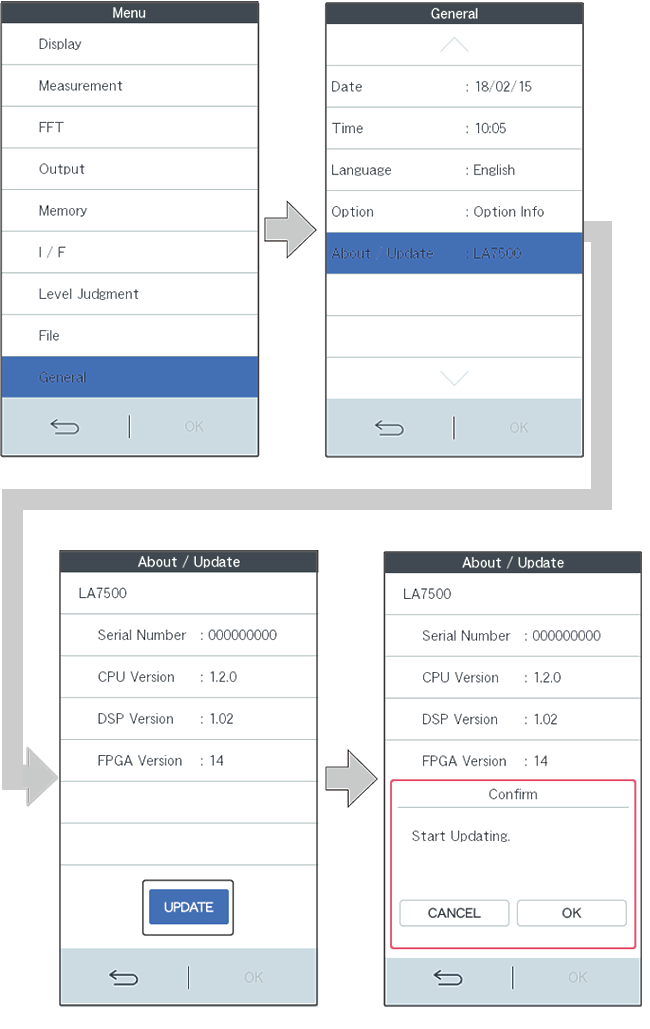
Switch to the update screen.
From the menu mode screen.
Tap on Genera l >About/Update in order to switch to the About/Update screen.
Tap the UPDATE button to display the Start Update screen, and then tap the OK button.
Confirm that a new screen for the update will launch.
Starting update 4
First, tap the FIRMWARE UPDATE button on the update screen.
Next, after confirming that the target version is displayed in New Firmware Ver, tap Enable to switch to ON.
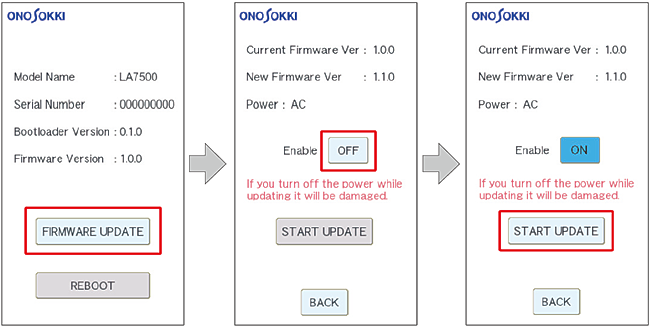
Finally, tap the START UPDATE button to switch to the update progress screen and start the update.
* During the update, please do not remove or insert the SD card, and do not turn off the power of the sound level meter.
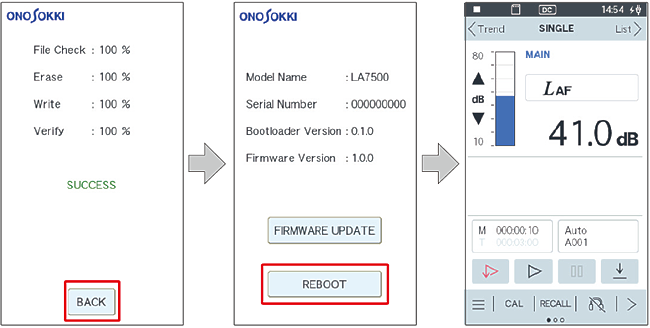
Confirm the completion of the update.
Wait until each item of File Check/Erase/Write/Verify reaches 100%. After confirming that SUCCESS is displayed, tap the BACK button to return to the update screen.
After confirming that the Firmware Version has been updated to the latest version, tap the REBOOT button. The sound level meter will automatically restart and return to the measurement screen, completing the update.
Add optional features
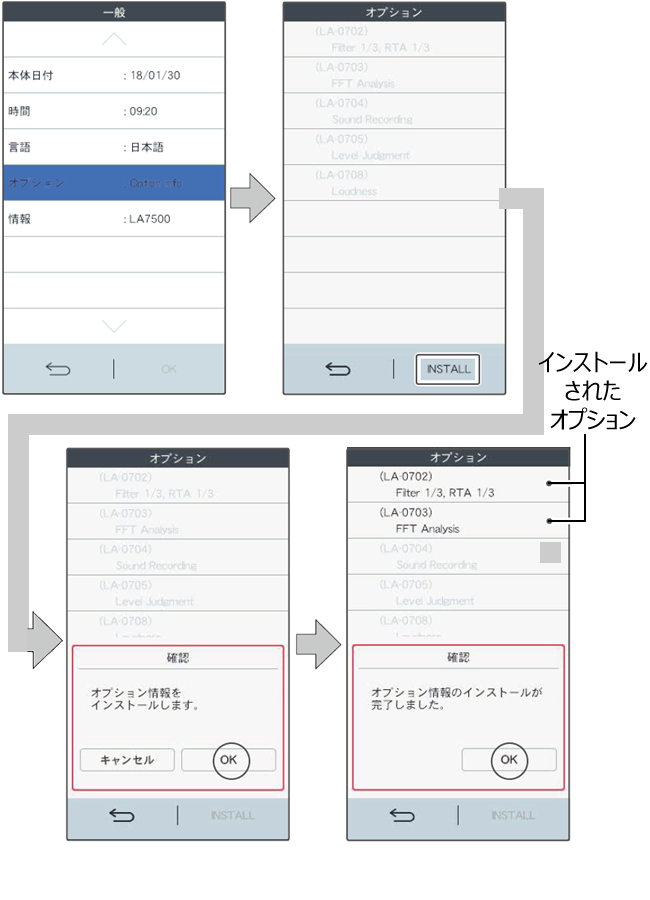
Switch to the options screen.
From the menu mode screen, tap General > Options in order to switch to the options screen.
Starting the installation.
First, tap the INSTALL button on the options screen. Next, tap ON on the installation confirmation message for the option information to start the installation. After confirming the installation completion message, tap ON. When the installation is successfully completed, the valid options will be displayed in black text.
3. Check the added options.
Return to the measurement screen, activate the additional installed option, and please confirm its operation.
above
Last updated: 2018-03-14