

sound level meter Frequently Asked Questions
Question number FAQ-1194
How to set measurement conditions.
This section describes the settings for measurement mode, measurement values, level range, frequency correction characteristics, and dynamic characteristics.
<Memo>
For the meaning of the terms, please refer to What's New → Ono Sokki Report "What is a sound level meter" section.
1. Setting of the measurement mode.
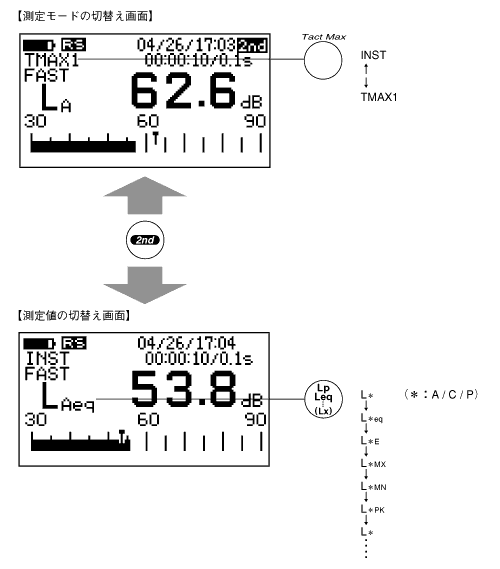
There are two measurement modes: instantaneous value (INST) display mode and maximum value per second (TactMax) display mode, which can be switched by pressing the panel switch labeled 'Tact Max'. The selected measurement mode is displayed in the upper left corner of the screen, with instantaneous value shown as 'INST' and maximum value per second shown as 'TMAX1'.
◆ Operation
- Set the panel switch function to function 2.
Press the panel switch [2nd] to enable function 2. - Press the panel switch [Tact Max].
Each time you press the panel switch [Tact Max], it toggles between the instantaneous value (INST) and the maximum value per second (TACTMAX).
2. Setting of measurement values (measured quantities)
The measurement values are switched using the panel switch [LP / Leq...]. Each time the panel switch [LP / Leq...] is pressed, the measurement value changes.
<Memo>
LX (time-weighted noise level) can be displayed after the LX calculation is completed. Note that it cannot be displayed on the normal measurement screen.
3. Setting the Level Range
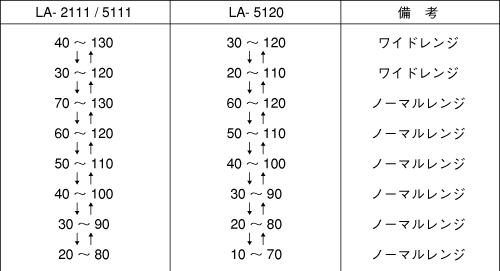
List of Level Range Values
There are two types of level range setting modes: wide range and normal range, which is used in combination with a level recorder. For regular measurements, it is recommended to set it to wide range to minimize concerns about over or under measurement. Please refer to the following table to set the appropriate range according to your application and purpose.
How to set the level range.
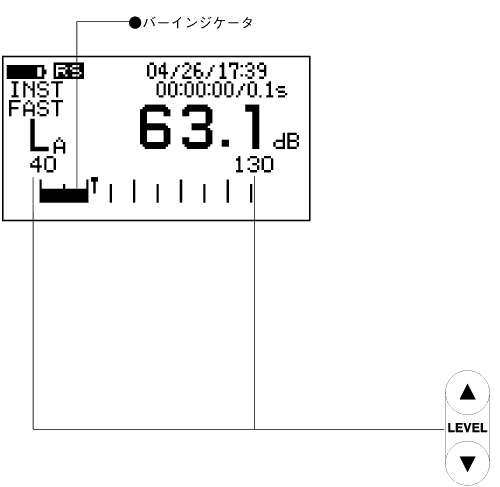
The value of the level range is set by pressing the panel switch [LEVEL △・▽] so that the bar indicator is positioned near the center. Each time the panel switch [LEVEL △・▽] is pressed, the value increases or decreases in increments of 10 dB.
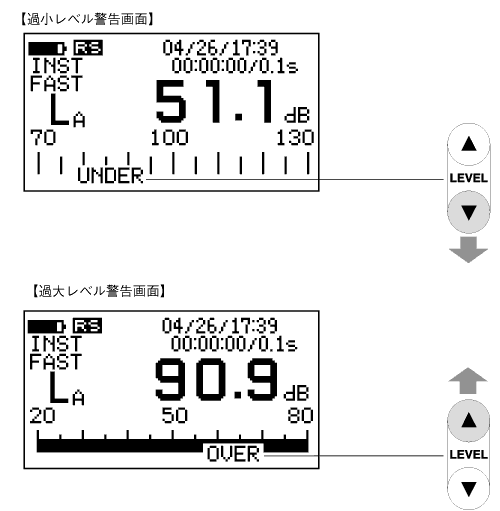
■Excessive/Insufficient Level Warning Function
The over/under level warning function indicates 'OVER' when the input level exceeds the upper limit set in the level range by more than 10dB, and displays 'UNDER' when the input level falls below the lower limit set in the level range. When an over warning (OVER) is displayed, the level range value should be increased, and when an under warning (UNDER) is displayed, the level range value should be decreased. Additionally, the UNDER display shows at -5dB below the lower limit during normal range settings, and at the lower limit during wide range settings.
4. Setting of frequency correction characteristics
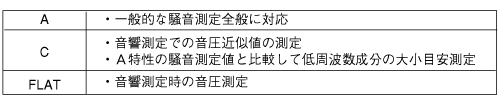
There are three types of frequency correction characteristics: A, C, and FLAT. Depending on the measurement purpose, the frequency correction characteristics can be set using the panel switch [A/C/FLAT].
Measurement purpose and frequency correction characteristics
Please set the frequency correction characteristics according to the following table to match the measurement purpose.
How to set frequency correction characteristics.
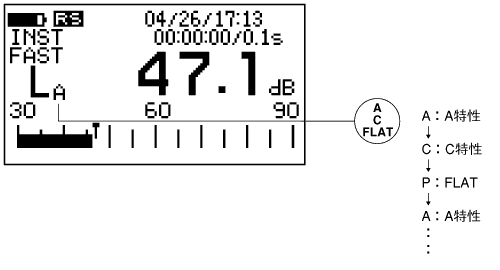
Each time you press the panel switch [A / C / FLAT], it cycles through the characteristics in the order of A characteristic → C characteristic → FLAT → A characteristic → …
5. Setting of dynamic characteristics
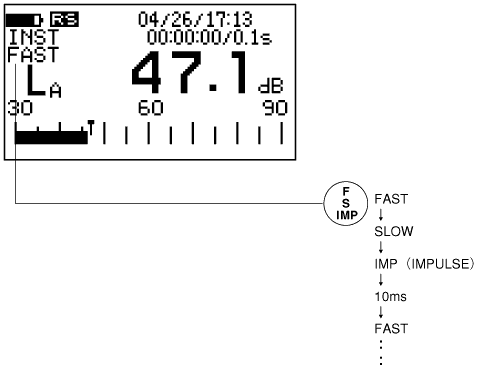
There are four types of dynamic characteristics: FAST, SLOW, IMPULSE, and 10ms. The time constant can be set using the panel switch [F/S/IMP] according to the measurement purpose.
Measurement Purpose and Dynamic Characteristics
Please set the dynamic characteristics according to the measurement purpose using the following table as a reference.

How to set dynamic characteristics
Each time the panel switch [F / S / IMP] is pressed, it switches in the order of FAST → SLOW → IMPULSE → 10ms → FAST → …
Last updated date: 2026-07-15