

Digital Gauge Frequently Asked Questions
Question number FAQ-0096
Measurement Methods for DG-825, DG-925, DG-525, DG525H
Power on
Connection of the AC adapter
Remove the round hole of the cover cap for the plug of the included AC adapter and insert it.
Please use the AC adapter at AC 100 V. When not using the AC adapter, be sure to put the cover cap on for dust protection.
Use with battery power.
Connect the AC adapter and charge with the power switch in the OFF position.
It will be fully charged in 16 hours. Please avoid charging for more than 16 consecutive hours. (Note on long-term use of AC adapter)
|
Remove the AC adapter and turn the power switch on.
When the rechargeable battery falls below the specified voltage, a "B" mark will be displayed on the LCD display.
Please connect the AC adapter and charge the device when the 'B' mark is displayed. |
 |
<3 Use with AC adapter.
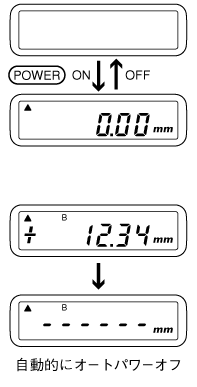
Connect the AC adapter and turn on the power switch to use it. At this time, a small amount of charging is taking place, so the device will not power off even if the supply from the AC adapter is cut off. Please turn it off using the power switch. Do not use the device for long periods while the AC adapter is still connected.
<4>When the power is turned on, if 0.00mm zero is not displayed (nothing is displayed)
When using for the first time after purchase, or if you use it again after several months, you may find that nothing appears on the display, such as 0.00mm, even when the power is on. This is because the battery is discharged, so please charge it. For the method of charging (restoration), please refer to here.
Method for Zero Reset
When the power is turned on, the display shows zero, and similarly, when the reset switch is pressed briefly, the display also shows zero, and at that time, the position of the spindle becomes the zero position.
Selection of counting direction
The measured values are counted as either addition or subtraction according to the movement of the spindle. The direction is indicated on the display with the marks ▲ or ▼. The direction can be switched using the direction switch labeled '+/-'.
▲: Increment (in the positive direction) when the spindle is pushed in.
When the spindle is pushed in, subtraction (negative direction)
Caution
If you switch directions during measurement, it will change at the moment the direction switch is pressed, so please make your selection before starting the measurement.
Connect to the printer.
You can connect the output connector to an optional printer. By turning on the printer's print switch, you can print out the displayed values.
Last updated: 2001-01-12